Guides
Info
All in-game resources are packed into the pak01_dir.vpk file. Path: Steam/steamapps/common/dota 2 beta/game/dota/
Replacing images (vtex)
Images in Dota 2 use the .vtex_c format.
Main directories
All images are stored in subfolders of panorama/images/. Main paths:
| Resource type | Path |
|---|---|
| Ability icons | panorama/images/spellicons/ |
| Hero icons | panorama/images/heroes/ |
| Rank icons | panorama/images/rank_tier_icons/ |
| Item icons | panorama/images/items/ |
Tools
- Decompiling/Viewing: Source2Viewer
- Editing: Photoshop, miniPaint, or any other graphics editor.
- Compiling: Compiler
- Packing: VPKTool
Example: replacing an ability icon
Let's replace Dazzle's Shallow Grave icon:
- Navigate to
panorama/images/spellicons/inside pak01_dir.vpk. - Find and decompile the
dazzle_shallow_grave_png.vtex_cfile using Source2Viewer. - Open the resulting image in a graphics editor, make your changes, and save the file as
.png. - Use Compiler to compile the image into
.vtex_cformat. - Create a folder with the path
panorama/images/spellicons/and place your compiled file inside. - Use VPKTool to create a
.vpkarchive from this folder. - Move the resulting
.vpkfile to the mods directory (your game's language folder).
Replacing sounds (vsnd)
Sounds in Dota 2 use the .vsnd_c format.
Main directories
All sounds are stored in subfolders of sounds/. Main paths:
| Resource type | Path |
|---|---|
| Item sounds | sounds/items/ |
| Hero ability sounds | sounds/weapons/hero/ |
| Hero voice lines | sounds/vo/ (ignore announcer_dlc_) |
| Music | sounds/music/ |
Tools
- Decompiling/Viewing: Source2Viewer
- Editing: Tenacity or any other audio editor.
- Compiling: Compiler
- Packing: VPKTool
Example: replacing an item sound
Let's replace the Force Staff sound:
- Find any sound in
.mp3or.wavformat. - Edit it if needed.
- Use Compiler to compile the file into
.vsnd_cformat. - Rename the file to
force_staff.vsnd_c - Create a folder with the path
sounds/items/and place your compiled file inside. - Use VPKTool to create a
.vpkarchive from this folder. - Move the resulting
.vpkfile to the mods directory (your game's language folder).
Editing styles (vcss)
Styles in Dota 2 use the .vcss_c format.
Main directories
All styles are stored in subfolders of panorama/styles/.
Tools
- Decompiling/Viewing: Source2Viewer
- Editing: gram or any other text editor.
- Compiling + Packing: Minify
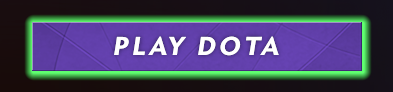
Example: changing the "Play" button style
1. Enabling developer mode
In Dota 2's launch options (Steam → right-click Dota 2 → Properties → General), enter: -dev -language english
Launch the game.
2. Finding the element via Panorama Debugger
- After the main menu loads, press
F6to open Panorama Debugger. - Click the Play Dota button — the corresponding component will be automatically highlighted in the element tree.
- The right-hand column shows the styles applied to the element; you can also temporarily edit values there in real time to see the result immediately.
- The button has the
#PlayButtonattribute. Next to it, the file where this style is declared will be shown —play.css.
Tip
Edits made in Panorama Debugger aren't saved and reset when the game restarts — this is just a way to quickly dial in the values you want before transferring them to your mod file.
3. Extracting and editing the source style file
- In Source2Viewer, open
pak01_dir.vpkand find theplay.vcss_cfile atpanorama/styles/. - Decompile and open the file.
- Find the
.PlayButtonselector in it and edit the properties you want. Example of changing the background and font style of the button:
.PlayButton
{
    width: 330px;
    max-height: 49px;
    margin-bottom: 21px;
    margin-right: 58px;
    padding: 4px 12px 4px 12px;
    background-color: #6d47bf; /* purple background*/
    font-style: italic; /* font style*/
    box-shadow: fill #5eff6e 1px 1px 8px 1px; /* green glow*/
    opacity: 1.0;
    transition-property: box-shadow, background-color, opacity, transform;
    transition-delay: 0.0s;
    transition-duration: 0.2s;
    transition-timing-function: ease-in-out;
}
4. Preparing the mod via Minify
- Download Minify and go to its
modsfolder. - Copy the
User Stylesfolder and rename the copy, for example, toPlay Button. - Inside the new folder, rename the
_styling.cssfile tostyling.cssand open it. - Clear the file's contents entirely and paste the following code, specifying the path to the original resource in the comment and using the adjusted selector:
/* g:panorama/styles/play */
#PlayButton {
    width: 330px;
    max-height: 49px;
    margin-bottom: 21px;
    margin-right: 58px;
    padding: 4px 12px 4px 12px;
    background-color: #6d47bf;
    font-style: italic;
    box-shadow: fill #5eff6e 1px 1px 8px 1px;
    opacity: 1.0;
    transition-property: box-shadow, background-color, opacity, transform;
    transition-delay: 0.0s;
    transition-duration: 0.2s;
    transition-timing-function: ease-in-out;
}
Tip
You can read more about CSS here, or use an AI.
5. Compiling and installing
- Launch Minify, select the mod you created (
Play Button) and the desired game language. - Click Patch and wait for the process to finish.
- Launch Dota.
Replacing Models
Replacing and Editing Effects
Attaching effects to model
Important
This is a simplified guide, it does not cover animations or cloth physics
Text Replacement
Text in Dota 2 is stored in .txt files.
Main Directories
All localization files are located in the resource/localization/ folder.
| Text Type | File |
|---|---|
| Game interface | dota_<language>.txt |
| Ability text | abilities_<language>.txt |
| Settings | gameui_<language>.txt |
Replace <language> with your game language, for example english.
Tools
- Extract/View: Source2Viewer
- Editing: Notepad++, VS Code, or any text editor.
- Packaging: VPKTool
Example: Changing Match Result Text
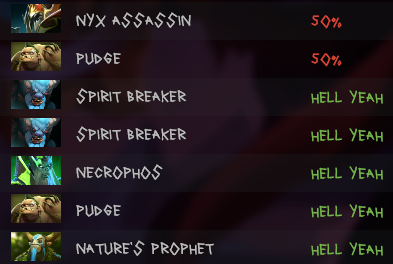
In this example, we'll change the "Win" and "Loss" text shown in the match history.
- Open
pak01_dir.vpkusing Source2Viewer. - Navigate to
resource/localization/. - Extract
dota_english.txt(or the file for your language). - Find these lines:
"dota_profile_recent_game_result_win" "Win"
"dota_profile_recent_game_result_loss" "Loss"- Replace the text:
"dota_profile_recent_game_result_win" "HELL YEAH"
"dota_profile_recent_game_result_loss" "50%"- Save the file.
- Create the folder
resource/localization/and place the edited file inside it. - Create a
.vpkarchive using VPKTool. - Move the finished
.vpkfile into your game's language folder.
Important
Valve frequently updates localization files, sometimes even without releasing a game patch. After an update, your changes may stop working or some text may become incorrect.
If this happens, extract the updated localization file again and repeat your changes, or use the automatic method below.
Automatic Replacement with a Script
This method automatically reapplies your changes to the latest localization file after every Dota 2 update.
1. Installation
Install:
- Python
- the
vpkmodule:
pip install vpkDownload the archive containing the script and extract it.
2. Configuration
Open main.py and set the required paths:
VPK_PATH = r"C:\Program Files (x86)\Steam\steamapps\common\dota 2 beta\game\dota\pak01_dir.vpk"
INTERNAL_FILE_PATH = "resource/localization/dota_english.txt"
REPLACE_FILE = "replace.txt"
OUTPUT_VPK = "pak02_dir.vpk"
Parameters:
VPK_PATH— path to the originalpak01_dir.vpk.INTERNAL_FILE_PATH— path to the localization file inside the archive.REPLACE_FILE— file containing your custom replacements.OUTPUT_VPK— name of the generated mod.
3. Adding Replacements
Open replace.txt and add the lines you want to replace:
"dota_profile_recent_game_result_win" "HELL YEAH"
"dota_profile_recent_game_result_loss" "50%"
4. Building the Mod
Open a command prompt in the script folder and run:
python main.pyWhen the script finishes, it will generate pak02_dir.vpk.
Move it to your game's language folder.
Tip
After every Dota 2 update, simply run python main.py again. The script will automatically use the latest localization file and reapply all replacements from replace.txt.
Font Replacement
Fonts in Dota 2 are stored as regular .ttf/.otf files, so replacing them doesn't require Source2Viewer or VPKTool — you just need to prepare the font files and place them in the right folder.
Main Directories
Fonts are stored in the panorama/fonts/ folder.
The game uses two main fonts:
| Font Name | File |
|---|---|
| Radiance | radiance-light.otf |
| Reaver | reaver-regular.otf |
Tools
- Font editing: FontForge
- Font search: online-fonts or any other font website
Example: Replacing the Main Interface Font
- Find and download a font you like, for example on online-fonts.
When choosing a font, it's recommended to paste the following text into the preview field to immediately see how the font looks with Cyrillic characters, numbers, and special symbols:
BrownЧёрный123./?!Download the font file and make a copy of it — you'll need two identical files: one will replace Radiance, the other will replace Reaver.
Open FontForge and open the first font file in it.
Go to Element → Font Info and specify:
- Fontname:
Radiance-Light - Family Name:
Radiance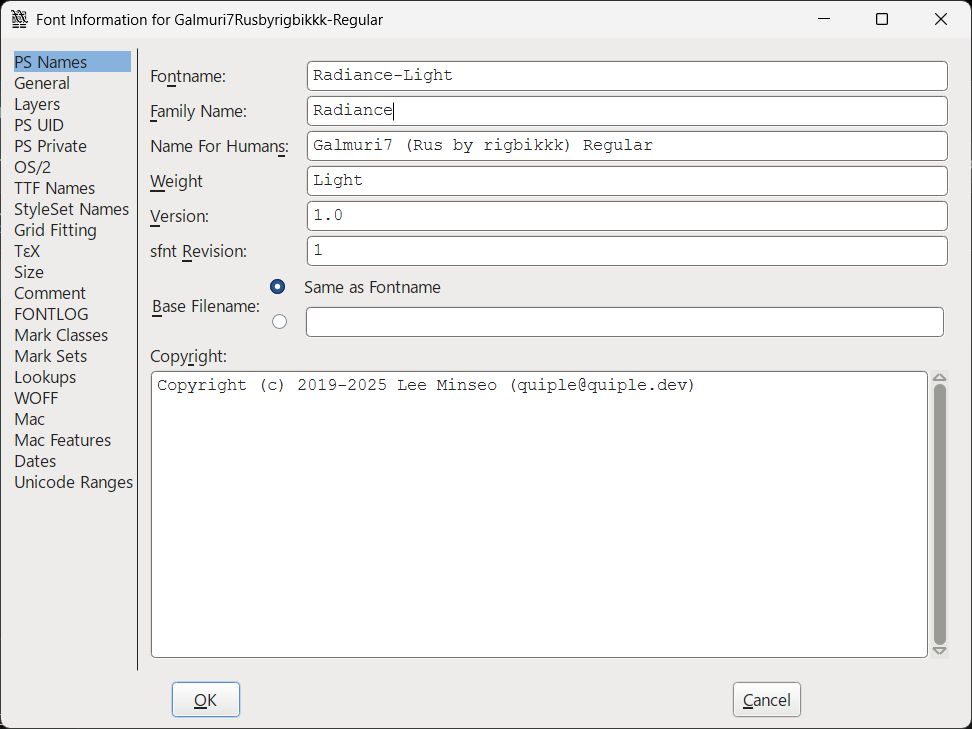
- Fontname:
Click OK, then File → Generate Fonts.
Select the OpenType (CFF) format, set the file name to
Radiance-Light, and click Generate (if a warning appears, click Yes; if an error occurs, click Generate again).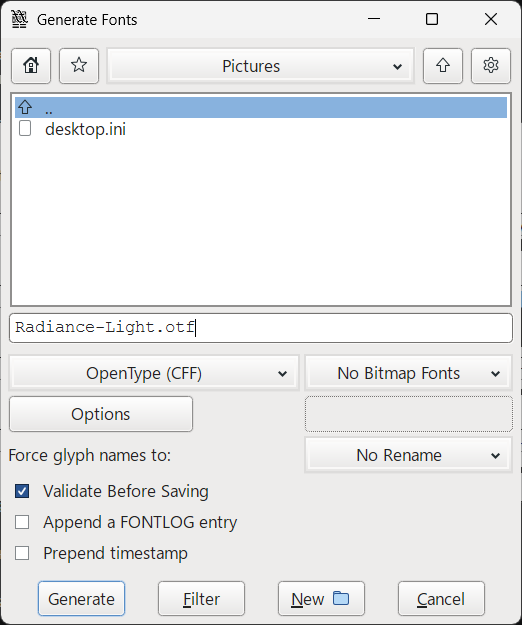
Repeat steps 3–6 with the second (copied) font file, but specify different values:
- Fontname:
Reaver-Regular - Family Name:
Reaver - File name:
Reaver-Regular
- Fontname:
Navigate to the folder with the installed fonts:
Steam\steamapps\common\dota 2 beta\game\dota\panorama\fontsTip
Before making changes, copy the fonts folder to your desktop — this will let you quickly restore everything to its original state.
- Delete all files in this folder except
grenze-boldandcreepster-regular, and place the two generated files (Radiance-Light.otfandReaver-Regular.otf) there. - Launch Dota.
How to Revert Everything
To roll back the changes, delete the fonts folder and put the previously copied folder from your desktop in its place. If you don't have a copy left, delete the fonts folder and run a file integrity check.
Launching Workshop Tools on Linux
1. Enabling Proton Experimental
- Open the Dota 2 properties in Steam.
- Go to the Compatibility section.
- Enable Force the use of a specific Steam Play compatibility tool.
- Select
Proton Experimental. - Wait for the necessary files to finish downloading.
2. Installing Workshop Tools
After the files have finished downloading:
- Open the Dota 2 properties in Steam.
- Go to the DLC section.
- Install Dota 2 Workshop Tools DLC.
- Wait for the necessary files to finish downloading.
3. Configuring Launch Options
In the Dota 2 properties, add the following launch options: -tools -addon main -language english -novid
mainis the name of the addon that will be used by Workshop Tools. If you want to use a different name, replacemainwith your chosen name in all subsequent steps.
4. Creating the Addon Folder
- Go to:
Steam/steamapps/common/dota 2 beta/content/dota_addons - Create a folder named:
main - This folder is where the required source, or uncompiled, files will be placed.
5. Preparing Compiled Files
- Go to:
Steam/steamapps/common/dota 2 beta/game/dota_addons - Copy the
template_addonfolder. - Rename the copy to:
main - Open the newly created
mainfolder and delete everything except:addoninfo.txt
This folder will contain the compiled files.
6. Launching Workshop Tools
After completing all the steps, launch Dota 2 through Steam.
Workshop Tools should start with the main addon.
Disabling Workshop Tools
To return to the normal Dota 2 launch:
- Open the Dota 2 properties in Steam.
- Go to the Compatibility section.
- Disable the forced use of Proton Experimental.
- Wait for the required changes to finish.
- Remove the following launch options:
-tools -addon main -language english
Launching Workshop Tools Again
To use Workshop Tools again, repeat steps 1, 2, and 3. And then go through all that shit again...